
When I couldn't find those colors in a scoop neck t-shirt, I remembered some neon yellow pieces I'd seen (and actually liked) and decided to give it a whirl! My friend was a good sport and went with my color choices. Thanks, B.
However, there are some pops of neon on clothing here or there that I do think are fun! Plus, my brother has these great neon yellow/green running shoes. I am certain no one will ever hit him on the road because you could spot him from a few miles away. These shoes were the start of me being on board with a tad bit of neon. And the images below helped to inspire me further.


Aren't they pretty?
To view the original tutorial for these t-shirts, click here to see Uber Chic for Cheap walk you through it.
To view the original tutorial for these t-shirts, click here to see Uber Chic for Cheap walk you through it.
Here is my version!
Colorblock Tee
Supplies:
two t-shirts in the same size of different colors
fabric scissors
ruler
pencil
pins
basic thread
sewing machine
Total time:
Well, that depends! I am slow, so this took me approximately 1.5 hours.
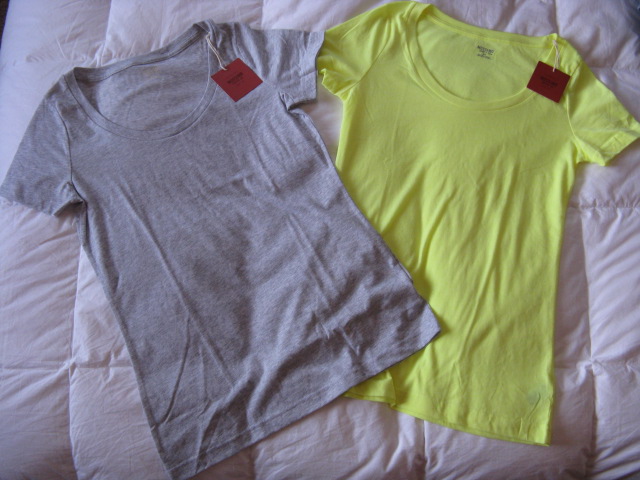
Pick up two new t-shirts that fit well, both in the same size and in two different colors. We decided that the scoop neck would work well for this project, and we got our t-shirts from Target for $8 each.
Decide where you would like to cut each shirt in "half." I measured 2" below the neckline and used a ruler to draw a pencil line across the front of the shirt.

My favorite little man was "helping!"

After you've measured and drawn your line, cut with a sharp pair of fabric scissors. My mom has a mat and rotary cutter that would have worked great for this. But, she lives 2.5 hours away!

You will be left with four pieces.

First t-shirt pieces:

Second t-shirt pieces: (notice my little helper's hand in the bottom right corner...I love him)

I kept the yellow-topped shirt combination, and I mailed the other pieces to my friend.
Next, turn the pieces inside out and pin the right sides together.

I used plain white thread and my sewing machine that my Gram gave me for our wedding to sew these pieces together. I do love my Gram so much. I am super new at sewing, but I am having fun learning. Slowly. Very slowly.
I first did a straight stitch to attach the pieces, being very careful with the tension because of the jersey nature of the fabric. I was also careful to be conscious that the seams on the sides matched up as closely as possible. Then, I did a zig-zag stitch along the edge of the fabric to avoid any fabric runs later on.

Turn it right side out, and there you have it!

I love how this project turned out. I wore it with my necklace that Andy gave me last year from J for Mother's Day...one of my very favorite pieces of jewelry to wear.


It looks like you had fun. Glad it turned out so well. I'll have to add you to my blog when I get mine finished. I'm actually excited about the neon on the bottom. Looking forward to showing you how it turns out. Yours looks amazing.
ReplyDeleteIt's so cute!
ReplyDeleteVery fun and inspiring! Oh, and I so enjoy your blog! Thank you for sharing.
ReplyDeleteYou know. This last picture reminds me of one from a long time ago. Suppose I should find it and post it?! ;)
ReplyDelete